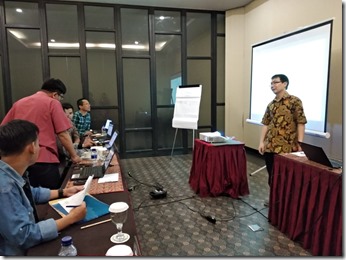
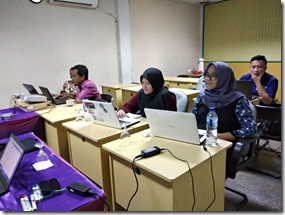
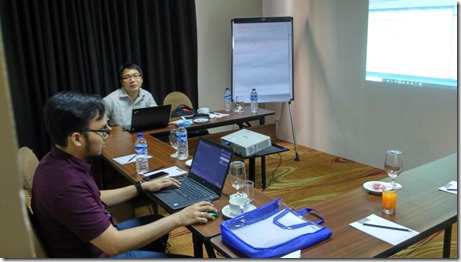
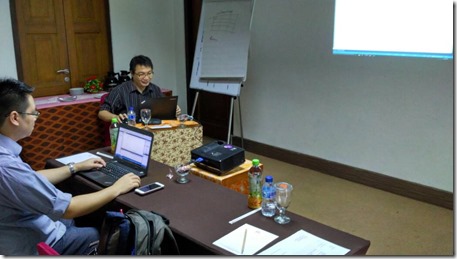
Pelatihan Web Development with ASP.NET

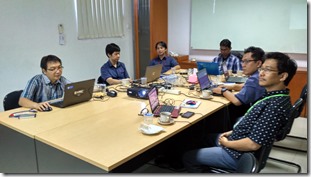
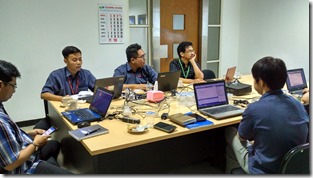
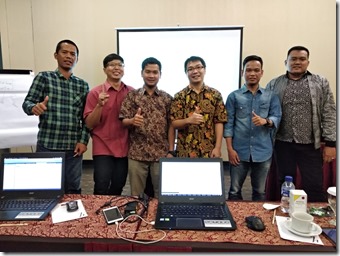
Pada tanggal 16-20 Juli 2018 telah dilaksanakan Pelatihan dengan Judul Web Development with ASP.NET. Peserta dari pelatihan ini adalah developer dari Badan Pengelola Keuangan dan Aset Daerah Sumatera Selatan.

Materi yang dipelajari pada pelatihan ini adalah sebagai berikut:

  • ASP.NET Introduction
  • ASP.NET Server Control
  • Designing ASP.NET Website
  • Menggunakan Data Binding
  • Databound Control
  • Penggunaan ListView dan DataPager Control
  • Data Access dengan ADO.NET
  • Object Relational Mapping dengan EF
  • Data Access dengan ORM
  • Security menggunakan ASP.NET Identity
  • ASP.NET AJAX & AJAX Control Toolkit
  • Membuat Report dengan RDLC Report

Detail silabus lengkap dapat diakses pada halaman berikut ini

12.

Pelatihan ASP Core 2.0

Pelatihan ASP.NET Core 2.0 & Web API ini dilaksanakan pada tanggal 29-31 Mei 2018. Peserta dari pelatihan ini adalah developer dari PT IKIN dan Startup Miligram yang berlokasi di Semarang.

Materi yang dipelajari pada pelatihan ini adalah sebagai berikut:

  • Pengenalan .NET Core dan ASP.NET Core
  • Web Server (Kestrel, IIS)
  • Visual Studio Community 2017 / Visual Studio Code
  • .NET Core SDK dan Runtime
  • ASP.NET Core (Cara kerja ASP.NET Core, File & Folder Utama, csproj)
  • ASP.NET Routing
  • ASP.NET Controller
  • ASP.NET Model
  • ASP.NET View
  • Strongly Type ASP.NET MVC View
  • ASP.NET Helpers & Tag Helper
  • Partial View
  • View Component
  • View Layout
  • Entity Framework Core
  • ASP.NET Web API
  • Representational State Transfer
  • REST and Web API
  • HTTP Services using Web API
  • Using Fiddler
  • HTTP Response Codes
  • Http Response Exception
  • Implementing POST
  • Implementing PUT
  • Implementing DELET\
  • Authentication dan Authorization pada Web API
  • ASP.NET Identity
  • Arsitektur Security Web API
  • Token Based Authentication
  • Deploy to Azure VM
  • Deploy to Azure App Services
  • Using REST Sharp Library for accessing AP
  • Web Client & Mobile Client

WhatsApp Image 2018-05-31 at 13.46.06

Pelatihan ASP.NET Core 2.0 (PT Pertamina Trans Kontinental)

Pelatihan ASP.NET Core 2.0 ini dilaksanakan pada tanggal 21-23 Februari 2018. Peserta dari pelatihan ini adalah web developer dari PT Pertamina Trans Kontinental.

Materi yang dipelajari pada pelatihan ASP.NET Core 2.0 adalah sebagai berikut:

  • Pengenalan .NET Core dan ASP.NET Core
  • Web Server (Kestrel, IIS)
  • Visual Studio Community 2017 / Visual Studio Code
  • .NET Core SDK dan Runtime
  • ASP.NET Core (Cara kerja ASP.NET Core, File & Folder Utama, csproj)
  • ASP.NET Routing
  • ASP.NET Controller
  • ASP.NET Model
  • ASP.NET View
  • Strongly Type ASP.NET MVC View
  • ASP.NET Helpers & Tag Helper
  • Partial View
  • View Component
  • View Layout
  • Entity Framework Core
  • Study Case

Untuk detail materi pada pelatihan ini dapat diakses pada link berikut ini.

Jika anda tertarik mengikuti pelatihan ini anda dapat menghubungi nomor HP berikut 087876133054 (WA) untuk informasi jadwal dan meminta penawaran lebih lanjut.

2

Training ASP.NET Web API (PT Kompas Gramedia)

Pada tanggal 2-5 Mei 2017 telah dilaksanakan training dengan judul Build REST API with ASP.NET Web API.  Pelatihan ini diikuti oleh software engineer dari PT Kompas Gramedia Jakarta.

Pelatihan ini bertujuan untuk memberikan pengetahuan praktis tentang pengembangan web services (REST) dengan teknologi ASP.NET Web API. ASP.NET Web API adalah framework untuk pengembangan REST web services dari Microsoft. Web API memudahkan pengembang untuk membuat aplikasi backend yang dapat digunakan untuk berbagai macam aplikasi client seperti aplikasi web (AngularJS, ReactJS, JQuery, Kendo)  dan aplikasi mobile (Android, IOs).

1

Pelatihan ASP.NET MVC 5 (Politeknik Caltex Riau)

Pada tanggal 14-17 September 2016 telah dilaksanakan pelatihan dengan tema Developing Web Application with ASP.NET MVC 5. Pelatihan ini diikuti oleh peserta yang merupakan tenaga pengajar/dosen yang berasal dari Politeknik Caltex Riau.

Adapun materi yang dibahas pada pelatihan ini adalah sebagai berikut:

No

Module

1

Introduction To ASP.NET MVC

· MVC vs Web Form

· Consideration using Web Form or MVC

· ASP.NET MVC Design Goal

· MVC Pattern

· MVC Routing

· Controller in MVC

· Controller & View Convention

· Views in MVC

· View Helpers

· Action Filters

· Unit Testing

2

MVC – Controller

· Routing

· Controller Action

· Action Filters

· Custom Action Filter

· Action Parameter

· Action Result

· ViewData & ViewBag

· Request Validation

3

MVC – Model

· ADO.NET Entity Framework

· EF Code First

· LINQ

· Mapping

· Model Binding

· Validation with Annotation

· Custom Validation

· Display & Edit Annotation

4

MVC – Views

· Razor View Engine

· Syntax Razor

· HTML Helpers

· Custom Helpers

· Layout

· Partial Views

· Security (XSS & CRSF)

5

MVC – AJAX

· JQuery

· AJAX Helpers

· JQuery UI

· Client Validation

· Unobtrusive Javascript

· JSON Action

· JQuery Templates

· NuGET

· Other third party libraries

6

MVC – Infrastructure

· Caching

· Cache Profile

· Resources

· Diagnostic

9

MVC – Security

· ASP.NET Identity

· XSS

· Authentication

· Authorization

· CSRF

8

Configuration & Deployment

· Configuration files for .NET

· ASP.NET & IIS

· Custom Error

· Web Deployment Package

9

Study Case : Build Simple E-Commerce Application

IMG_20160917_161953

Pelatihan Web Development with ASP.NET MVC 5 (PT Pura Group)

Pada tanggal 25-28 Juli 2016 telah diadakan pelatihan in-house dengan topik Web Development with ASP.NET MVC 5.  Pelatihan ini diikuti oleh peserta dari Pura Smart Technology, Kudus.

Adapun materi yang disampaikan pada pelatihan tersebut adalah sebagai berikut:

No Materi

1

Introduction To ASP.NET MVC

  • · MVC vs Web Form
  • · Consideration using Web Form or MVC
  • · ASP.NET MVC Design Goal
  • · MVC Pattern
  • · MVC Routing
  • · Controller in MVC
  • · Controller & View Convention
  • · Views in MVC
  • · View Helpers
  • · Action Filters
  • · Unit Testing

2

MVC – Controller

  • · Routing
  • · Controller Action
  • · Action Filters
  • · Custom Action Filter
  • · Action Parameter
  • · Action Result
  • · ViewData & ViewBag
  • · Request Validation

3

MVC – Model

  • · ADO.NET Entity Framework
  • · EF Code First
  • · LINQ
  • · Mapping
  • · Model Binding
  • · Validation with Annotation
  • · Custom Validation
  • · Display & Edit Annotation

4

MVC – Views

  • · Razor View Engine
  • · Syntax Razor
  • · HTML Helpers
  • · Custom Helpers
  • · Layout
  • · Partial Views
  • · Security (XSS & CRSF)

5

MVC – AJAX

  • · JQuery
  • · AJAX Helpers
  • · JQuery UI
  • · Client Validation
  • · Unobtrusive Javascript
  • · JSON Action
  • · JQuery Templates
  • · NuGET
  • · Other third party libraries

6

MVC – Infrastructure

  • · Caching
  • · Cache Profile
  • · Resources
  • · Diagnostic

9

MVC – Security

  • · ASP.NET Identity
  • · XSS
  • · Authentication
  • · Authorization
  • · CSRF

8

Configuration & Deployment

  • · Configuration files for .NET
  • · ASP.NET & IIS
  • · Custom Error
  • · Web Deployment Package

9

Study Case : Build Simple E-Commerce Application

Untuk penawaran pelatihan anda dapat mengirimkan email ke info@actual-training.com.

IMG_20160728_103136_HDRIMG_20160728_103426_HDR

Membuat aplikasi ASP.NET Core dengan Visual Studio Code (Part 1)

Pada tutorial kali ini kita akan mencoba untuk membuat aplikasi ASP.NET Core dengan editor Visual Studio Code.

Seperti yang sudah kita ketahui bahwa Microsoft baru-baru ini merilis ASP.NET Core dan .NET Core yang merupakan versi minimalis dari .NET Framework dan ASP.NET. Versi ini dioptimalkan untuk kebutuhan pembuatan aplikasi berbasis layanan cloud.

Microsoft juga merilis versi mini dari Visual Studio yang diberi nama Visual Studio Code. Jika dibandingkan dengan Visual Studio maka Visual Studio Code terasa sangat ringan karena hanya fitur2 utama saja yang didukung. Visual Studio Code sangat mirip dengan code editor lain yang simple seperti Sublime atau Web Storm. Anda dapat mengunduh aplikasi Visual Studio Code secara gratis pada tautan berikut.

Langkah 1

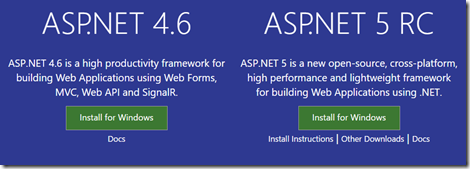
Install ASP.NET 5/ASP.NET Core library yang dapat diunduh pada tautan berikut.

image

ASP.NET Core saat ini masih pada versi RC Update 1, namun menurut Microsoft versi ini sudah cukup stabil untuk digunakan pada production. Jadi anda tidak perlu kuatir bila ingin menggunakan versi ini untuk project baru anda.

Setelah instalasi ASP.NET 5/Core selesai, anda dapat menjalankan perintah berikut untuk menginstal paket yeoman yang akan digunakan untuk membuat project asp.net.

npm install -g yo generator-aspnet gulp bower

Jika anda belum menginstal node.js pada komputer anda, anda dapat mengunduh node pada tautan berikut.

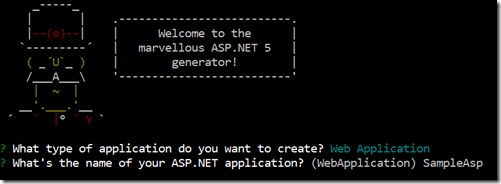
Setelah yeoman terinstal anda dapat menambahkan perintah yo aspnet untuk membuat project asp.net baru.

Kemudian pilih project Web Application dan beri nama projectnya SampleAsp.

image

image

Maka folder SampleAsp yang berisi semua file pada project akan dibuat. Pada command promt, masuk kedalam folder tersebut dan jalankan perintah dnu restore untuk mendownload semua package yang diperlukan via NuGet.

Setelah selesai anda dapat menjalankan perintah dnx web untuk menjalankan aplikasi ASP.NET 5/Core yang sudah anda buat.

image

Kemudian untuk menjalankan aplikasi web, anda dapat mengakses alamat http://localhost:5000 pada browser.

image

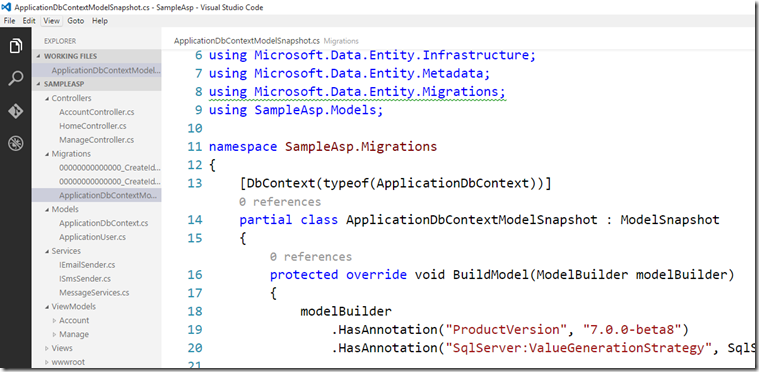
Untuk membuka project yang sudah kita buat di Visual Studio Code, pilih File – Open Folder – kemudian pilih folder SampleAsp. Setelah itu anda dapat mengedit dan menambahkan kode yang diperlukan.

image

Azure Table Storage dengan ASP.NET MVC (Part 2)

Pada bagian 1 kita sudah membahas apa itu Azure Table Storage dan bagaimana cara membuat Storage Account pada layanan Azure. Selanjutnya kita akan membuat ASP.NET MVC Project yang dapat terhubung dengan layanan Storage Account yang sudah kita buat, kemudian menambahkan data pada Storage Account berupa Azure Table dan Azure Blob. Azure Table digunakan untuk menyimpan data standard yang bertipe string/number (selain blob). Azure Blob digunakan untuk menyimpan data blob seperti file image, video, pdf, dan format lain yang biasanya mempunyai ukuran relatif besar.

Membuat Project ASP.NET MVC

Buka Visual Studio 2015 kemudian buat ASP.NET MVC Project baru dengan nama  SampleTableStorage. Kemudian pada folder model tambahkan interface baru dengan nama ITableOperations.cs. Method pada interface ini akan diimplementasikan pada method selanjutnya.

using Microsoft.WindowsAzure.Storage;
using Microsoft.WindowsAzure.Storage.Table;
using System.Collections.Generic;
using System.Configuration;
using System;

namespace SampleTableStorage.Models
{
    public interface ITableOperations
    {
        void CreateEntity(StorageEntity entity);
        List<StorageEntity> GetEntities(string filter);
        StorageEntity GetEntity(string partitionKey,string rowKey);
    } 
}

Masih pada folder Model, tambahkan class StorageEntity.cs. Class ini digunakan untuk mendefinisikan data model yang akan dibuat pada Azure Table. Class ini berisi definisi dari field-field yang akan dibuat pada Azure Table.

using Microsoft.WindowsAzure.Storage.Table;
using System;
using System.Collections.Generic;
using System.ComponentModel.DataAnnotations;
using System.Linq;
using System.Web;

namespace SampleTableStorage.Models
{
    public class StorageEntity : TableEntity
    {
        public StorageEntity()
        { }

        public StorageEntity(int storageId,string city)
        {
            this.RowKey = storageId.ToString();
            this.PartitionKey = city;
        }

        public string StorageId { get; set; }
        public string Size { get; set; }
        public string Environment { get; set; }
        public decimal PriceDay { get; set; }
        public decimal PriceMonth { get; set; }
        public string Space { get; set; }
        public string Access { get; set; }
        public string Description { get; set; }

        [Required(ErrorMessage = "Title Required !")]
        public string Title { get; set; }
        public string Address { get; set; }
        public string City { get; set; }
        public string State { get; set; }
        public string ZipCode { get; set; }
        public string Picture { get; set; }
        public double Length { get; set; }
        public double Height { get; set; }
        public string Phone { get; set; }

    }
}

Setelah membuat TableEntity, maka langkah selanjutnya adalah menambahkan operasi-operasi yang akan dilakukan di Table Storage seperti membuat dan mengambil data pada Azure Table. Pada folder Model, tambahkan class dengan nama TableOperations.cs.

Untuk bekerja dengan Storage Account yang ada di Azure anda harus menambahkan string koneksi pada project anda. Anda dapat mengambil string koneksi tersebut pada portal Azure.
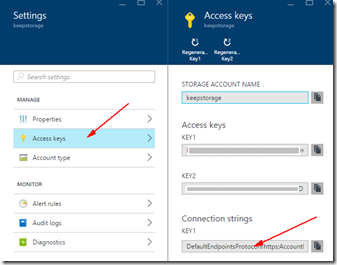
image

kemudian tambahkan string koneksi tersebut pada file konfirgurasi di web.config

<appSettings>
  <add key="webpages:Version" value="3.0.0.0" />
  <add key="webpages:Enabled" value="false" />
  <add key="ClientValidationEnabled" value="true" />
  <add key="UnobtrusiveJavaScriptEnabled" value="true" />
  <add key="keepStorage" value="DefaultEndpointsProtocol=https;AccountName=keepstorage;AccountKey=<key anda>;BlobEndpoint=https://keepstorage.blob.core.windows.net/;TableEndpoint=https://keepstorage.table.core.windows.net/;QueueEndpoint=https://keepstorage.queue.core.windows.net/;FileEndpoint=https://keepstorage.file.core.windows.net/" />
</appSettings>

Setelah string koneksi ditambahkan, anda dapat menggunakan string koneksi tersebut pada aplikasi anda untuk terhubung dengan Storage Account yang ada pada layanan Azure.

using Microsoft.WindowsAzure.Storage;
using Microsoft.WindowsAzure.Storage.Table;
using System.Collections.Generic;
using System.Configuration;
using System;
using System.Linq;

namespace SampleTableStorage.Models
{
    public class TableOperations : ITableOperations
    {
        CloudStorageAccount storageAccount;
        CloudTableClient tableClient;

        public TableOperations()
        {
            storageAccount = CloudStorageAccount.Parse(ConfigurationManager.AppSettings["keepStorage"].ToString());
            tableClient = storageAccount.CreateCloudTableClient();

            CloudTable table = tableClient.GetTableReference("keepstorage");
            table.CreateIfNotExists();
        }
        public void CreateEntity(StorageEntity entity)
        {
            CloudTable table = tableClient.GetTableReference("keepstorage");
            TableOperation insertOperation = TableOperation.Insert(entity);
            table.Execute(insertOperation);
        }

        public List<StorageEntity> GetEntities(string filter)
        {
            //List<StorageEntity> storages = new List<StorageEntity>();
            CloudTable table = tableClient.GetTableReference("keepstorage");

            List<StorageEntity> query = (from entity in table.CreateQuery<StorageEntity>()
                                               where entity.PartitionKey == "City"
                                               select entity).ToList();

            return query;
        }

        public StorageEntity GetEntity(string partitionKey, string rowKey)
        {
            StorageEntity entity = null;
            CloudTable table = tableClient.GetTableReference("keepstorage");
            entity = (from e in table.CreateQuery<StorageEntity>()
                      where e.PartitionKey == partitionKey && e.RowKey == rowKey
                      select e).FirstOrDefault();

            return entity;
        }
    }
}

Tambahkan juga class dengan nama BlobOperations.cs. Class ini akan digunakan untuk membuat dan menambahkan file blob kedalam objek Azure Blob pada Storage Account.

using System;
using System.Web;

using Microsoft.WindowsAzure.Storage;
using Microsoft.WindowsAzure.Storage.Blob;
using System.Configuration;
using System.Threading.Tasks;
using System.IO;


namespace SampleTableStorage.Models
{
    
    public class BlobOperations
    {
        private static CloudBlobContainer storageBlobContainer;

        public BlobOperations()
        {
            var storageAccount = CloudStorageAccount.Parse(ConfigurationManager.AppSettings["keepStorage"].ToString());
            CloudBlobClient blobClient = storageAccount.CreateCloudBlobClient();

            storageBlobContainer = blobClient.GetContainerReference("blobkeepstorage");
            storageBlobContainer.CreateIfNotExists();
        }

        public CloudBlockBlob UploadBlob(HttpPostedFileBase storagePicFile)
        {
            string blobName = Guid.NewGuid().ToString() + Path.GetExtension(storagePicFile.FileName);

            CloudBlockBlob storageBlob = storageBlobContainer.GetBlockBlobReference(blobName);
            using (var fs = storagePicFile.InputStream)
            {
                storageBlob.UploadFromStream(fs);
            }

            return storageBlob;
        }
    }
}


Kemudian langkah selanjutnya adalah membuat controller  dengan nama StorageListController.cs. Pada controller ini kita akan menambahkan method yang digunakan untuk menambahkan data ke Azure Table dan Azure Blob.

using System;
using System.Collections.Generic;
using System.Linq;
using System.Web;
using System.Web.Mvc;

using SampleTableStorage.Models;
using System.Threading.Tasks;
using Microsoft.WindowsAzure.Storage.Blob;

namespace SampleTableStorage.Controllers
{
    public class StorageListController : Controller
    {
        BlobOperations blobOperations;
        TableOperations tableOperations;
               
        public StorageListController()
        {
            blobOperations = new BlobOperations();
            tableOperations = new TableOperations();
        }
        // GET: StorageList
        public ActionResult Index()
        {
            var storages = tableOperations.GetEntities("Spokane");
            return View(storages);
        }

        public ActionResult Create()
        {
            var objStorage = new StorageEntity();
            //objStorage.StorageId = Guid.NewGuid().ToString();
            objStorage.City = "Spokane";
            ViewBag.Environment = new SelectList(new List<string>() {
                "Outdoor","Indoor"
            });
            ViewBag.Access = new SelectList(new List<string>()
            {
                "Limited","Anytime"
            });

            return View();
        }

        [HttpPost]
        public ActionResult Create(StorageEntity obj,HttpPostedFileBase Picture)
        {
            //upload file to blob
            CloudBlockBlob storageBlob = null;
            if(Picture != null && Picture.ContentLength !=0)
            {
                storageBlob = blobOperations.UploadBlob(Picture);
                obj.Picture = storageBlob.Uri.ToString();
            }

            obj.City = "Spokane";
            obj.RowKey = Guid.NewGuid().ToString();
            obj.PartitionKey = obj.City;
            tableOperations.CreateEntity(obj);

            return RedirectToAction("Index","Home");
        }

    }
}

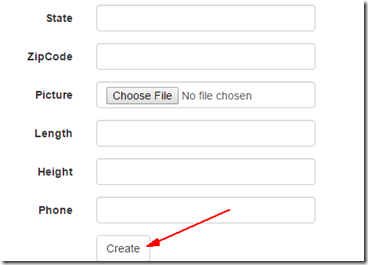
Setelah membuat controller maka untuk membuat form input yang akan kita gunakan untuk menambahkan data ke Azure Table anda dapat menambahkan view dengan nama Create.cshtml berikut.

@model SampleTableStorage.Models.StorageEntity

@{
    ViewBag.Title = "Create";
}

@using (Html.BeginForm("Create","StorageList",FormMethod.Post, 
    new { enctype = "multipart/form-data" }))
{
    @Html.AntiForgeryToken()


Storage Entity


@Html.ValidationSummary(true, "", new { @class = "text-danger" })
@Html.LabelFor(model => model.Size, htmlAttributes: new { @class = "control-label col-md-2" })
@Html.EditorFor(model => model.Size, new { htmlAttributes = new { @class = "form-control" } }) @Html.ValidationMessageFor(model => model.Size, "", new { @class = "text-danger" })
</div>
@Html.LabelFor(model => model.Environment, htmlAttributes: new { @class = "control-label col-md-2" })
@Html.DropDownListFor(model=>model.Environment, (IEnumerable)ViewBag.Environment,new { @class = "form-control" }) @Html.ValidationMessageFor(model => model.Environment, "", new { @class = "text-danger" })
</div>
@Html.LabelFor(model => model.PriceDay, htmlAttributes: new { @class = "control-label col-md-2" })
@Html.EditorFor(model => model.PriceDay, new { htmlAttributes = new { @class = "form-control" } }) @Html.ValidationMessageFor(model => model.PriceDay, "", new { @class = "text-danger" })
</div>
@Html.LabelFor(model => model.PriceMonth, htmlAttributes: new { @class = "control-label col-md-2" })
@Html.EditorFor(model => model.PriceMonth, new { htmlAttributes = new { @class = "form-control" } }) @Html.ValidationMessageFor(model => model.PriceMonth, "", new { @class = "text-danger" })
</div>
@Html.LabelFor(model => model.Space, htmlAttributes: new { @class = "control-label col-md-2" })
@Html.EditorFor(model => model.Space, new { htmlAttributes = new { @class = "form-control" } }) @Html.ValidationMessageFor(model => model.Space, "", new { @class = "text-danger" })
</div>
@Html.LabelFor(model => model.Access, htmlAttributes: new { @class = "control-label col-md-2" })
@Html.DropDownListFor(model => model.Access, (IEnumerable)ViewBag.Access ,new { @class = "form-control" }) @Html.ValidationMessageFor(model => model.Access, "", new { @class = "text-danger" })
</div>
@Html.LabelFor(model => model.Description, htmlAttributes: new { @class = "control-label col-md-2" })
@Html.EditorFor(model => model.Description, new { htmlAttributes = new { @class = "form-control" } }) @Html.ValidationMessageFor(model => model.Description, "", new { @class = "text-danger" })
</div>
@Html.LabelFor(model => model.Title, htmlAttributes: new { @class = "control-label col-md-2" })
@Html.EditorFor(model => model.Title, new { htmlAttributes = new { @class = "form-control" } }) @Html.ValidationMessageFor(model => model.Title, "", new { @class = "text-danger" })
</div>
@Html.LabelFor(model => model.Address, htmlAttributes: new { @class = "control-label col-md-2" })
@Html.EditorFor(model => model.Address, new { htmlAttributes = new { @class = "form-control" } }) @Html.ValidationMessageFor(model => model.Address, "", new { @class = "text-danger" })
</div>
@Html.LabelFor(model => model.City, htmlAttributes: new { @class = "control-label col-md-2" })
@Html.EditorFor(model => model.City, new { htmlAttributes = new { @class = "form-control" } }) @Html.ValidationMessageFor(model => model.City, "", new { @class = "text-danger" })
</div>
@Html.LabelFor(model => model.State, htmlAttributes: new { @class = "control-label col-md-2" })
@Html.EditorFor(model => model.State, new { htmlAttributes = new { @class = "form-control" } }) @Html.ValidationMessageFor(model => model.State, "", new { @class = "text-danger" })
</div>
@Html.LabelFor(model => model.ZipCode, htmlAttributes: new { @class = "control-label col-md-2" })
@Html.EditorFor(model => model.ZipCode, new { htmlAttributes = new { @class = "form-control" } }) @Html.ValidationMessageFor(model => model.ZipCode, "", new { @class = "text-danger" })
</div>
@Html.LabelFor(model => model.Picture, htmlAttributes: new { @class = "control-label col-md-2" })
@Html.ValidationMessageFor(model => model.Picture, "", new { @class = "text-danger" })
</div>
@Html.LabelFor(model => model.Length, htmlAttributes: new { @class = "control-label col-md-2" })
@Html.EditorFor(model => model.Length, new { htmlAttributes = new { @class = "form-control" } }) @Html.ValidationMessageFor(model => model.Length, "", new { @class = "text-danger" })
</div>
@Html.LabelFor(model => model.Height, htmlAttributes: new { @class = "control-label col-md-2" })
@Html.EditorFor(model => model.Height, new { htmlAttributes = new { @class = "form-control" } }) @Html.ValidationMessageFor(model => model.Height, "", new { @class = "text-danger" })
</div>
@Html.LabelFor(model => model.Phone, htmlAttributes: new { @class = "control-label col-md-2" })
@Html.EditorFor(model => model.Phone, new { htmlAttributes = new { @class = "form-control" } }) @Html.ValidationMessageFor(model => model.Phone, "", new { @class = "text-danger" })
</div>
</div> </div> }
@Html.ActionLink("Back to List", "Index")

Setelah itu anda dapat mencoba menjalankan aplikasi ini dan memasukan data kedalam Azure Table dan Azure Blob

image

Setelah berhasil anda dapat melihat isi dari Azure Table dan Azure Blob yang sudah anda buat di Visual Studio 2015 Cloud Explorer.

image

image